If you haven't tried pav bhaji before, you're in for a real treat! I first tried this iconic street good sandwich at a local restaurant called Duke Bombay Cafe and loved it. I couldn't wait to give pav bhaji a try in Mumbai where it originated. That's exactly what I did and I now make these colourful and tasty sandwiches often! This recipe first featured in my 'The Curry Guy Easy' and then later in my best selling cookbook 'The Curry Guy Bible'.

A Brief History of Pav Bhaji
Like so many great Indian street food dishes, pav bhaji was born out of necessity.
In the 1850s, during the textile mill boom in Mumbai (then Bombay), workers needed a quick, hot meal they could eat during short breaks. Vendors started mashing up leftover vegetables and cooking them with butter, onions, and spices on large flat griddles. They paired this with pav, Portuguese-inspired bread rolls introduced to India during colonial times. They are really just hamburger buns.
The result was cheap, filling, and delicious. Over time, pav bhaji evolved into a street food favourite, spreading from mill workers to students, families, and tourists. Today, it’s found in every corner of India, from roadside stalls to upscale restaurants, but it remains at its best when eaten on the street, with butter dripping down your fingers.
Ingredients
You can make pav bhaji quickly and easily. This delicious street food is even easier to prepare when you get your ingredients together first. The exact measurements of ingredients I use are in the recipe card at the bottom of the page.

- Potatoes
- Cauliflower florets
- Carrot
- Fresh or frozen peas
- Chopped tomatoes
- Salt, to taste
- Unsalted butter
- Red onion
- Cumin seeds
- Kashmiri chilli powder
- Ground turmeric
- Garlic
- Ginger
- Red (bell) pepper
- Garam masala
- Salt
- TO SERVE
- Soft buns
- Butter
- Coriander (cilantro)
- Lemon wedges
- Red onion
See recipe card for quantities.
Instructions
Check out my step by step photos to see just how easily you make Pav Bhaji, one of India's most popular street foods at home!

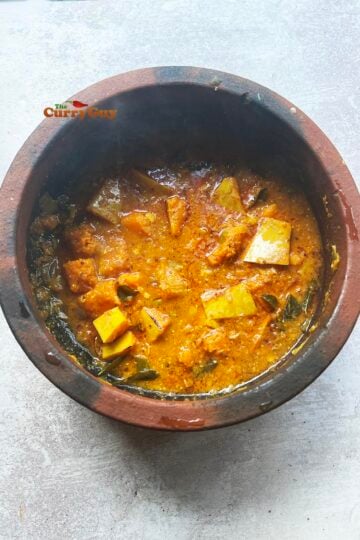
- Step 1: Put the potatoes, cauliflower, carrot, peas and tomatoes in a large pot and add just enough water to cover.

- Step 2: Bring to the boil and cover with a lid. Cook for about 20 minutes, stirring occasionally until the potatoes and vegetables are soft.

- Step 3: Using a potato masher, mash it all up. It should be a bit wetter than mashed potato consistency, like creamy and slightly chunky potato soup.

- Step 4: In another pan, melt about 100g (7 tablespoons) of the butter over a medium–high heat. Toss in the onion and cumin seeds and fry until the onion is soft.

- Step 5: Add the chilli powder, turmeric, garlic, ginger and red (bell) pepper and fry for a further minute or so.

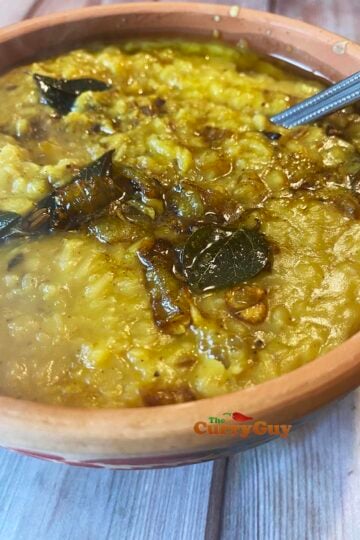
- Step 6: Stir it all together to combine. Then transfer to the pan with the boiled vegetables.

- Step 7: Stir it all together and add the butter.

- Step 8: Once mixed, season with salt to taste and stir in the garam masala.

- Step 9: Keep the bhaji warm while you toast the buns in butter.

- Step 10: Scoop the bhaji over the toasted pav and garnish with chopped red onion, coriander and squeeze lemon juice over th etop.
Variations
There are many different ways of making pav bhaji. The following examples are all self explanatory so give them a try if they sound good to you. I really love the butter-loaded version but tend not to make it too often because it's most definitely not the healthy option.
Cheese Pav Bhaji – Topped with a generous grating of cheese, this version is popular with college students in Mumbai.
Khada Pav Bhaji – Less mashed, with chunky pieces of vegetables.
Jain Pav Bhaji – Made without onions, garlic, or potatoes. Eating garlic, onions and potatoes isn't allow in the Jain religion. Plantains often replace potatoes.
Butter-loaded Pav Bhaji – Some stalls serve bhaji swimming in butter — indulgent, but delicious.
Equipment for making Pav Bhaji
The beauty of pav bhaji is that you don’t need fancy gadgets, but a few pieces of equipment will come in handy.
Heavy-bottomed pan or kadhai – Essential for cooking the bhaji (vegetable mash). A non-stick pan works too, but a heavy pan helps prevent sticking and allows the spices to bloom properly.
Potato masher – This is a must. The bhaji gets its signature texture from continuous mashing. You could use the back of a ladle, but a masher gives you that smooth-yet-chunky consistency.
Tawa (griddle) or frying pan – For toasting the pav rolls in butter. Vendors traditionally use a large tawa where both the bhaji and pav are cooked side by side.
Sharp knife and chopping board – Pav bhaji involves lots of vegetables, so good prep tools are handy.
Serving plates – Traditional pav bhaji is served in stainless steel compartment plates: bhaji in one section, pav in another, with chopped onions and lemon wedges on the side.
Storage
Pav bhaji is best eaten fresh, but leftovers can be stored easily:
Bhaji: Store in an airtight container in the fridge for up to 2–3 days. Reheat gently on the stove, adding a splash of water if it thickens too much. It also freezes well for up to a month.
Pav (hamburger buns): Store in a breadbox or airtight bag at room temperature for 1–2 days. Toast with butter just before serving. For longer storage, freeze pav rolls and reheat in the oven.
Onion and Lemon Garnish: Chop fresh each time; they don’t keep well once cut.
Top Tip
Prepare ahead of time: Like most curries, pav bhaji tastes better the next day. So feel free to make it a day before you serve it and then toast the buns just before serving.
FAQ
Yes. I find it just as easy to mix the spices myself and it is of course cheaper to do so.
You added too much water. Just cook it down with the lid off the pan until you are happy with the consistency. Add some more butter right at the end which will help emulsify the sauce.
There are a lot of vegetables in this dish. There's also usually a lot of butter. You can reduce the amount of butter you add if concerned.
Potatoes, peas, carrots, cauliflower, and bell pepper are standard. You can add beans, beetroot, squash or zucchini.
I've had a few spicy versions in India. It's really down to the vendor. It's also down to you when you make it at home. Add more or less chilli powder to taste.
Related
Looking for more delicious vegetarian recipes? Give these a try!


Rice
- Basmati Rice Recipe - Perfect White Rice
- Boiled Basmati Rice
- Pilau Rice
- Mushroom Fried Rice - Indian Restaurant Style


Naan


Dahls


Pav Bhaji

One of the best sandwiches on the planet and it's vegetarian! You will love pav bhaji!
Ingredients
- FOR THE VEGETABLES
- 2 large potatoes, peeled and finely sliced
- 250g (9oz) cauliflower florets
- 1 small carrot, peeled and diced
- 100g (3⁄4 cup) fresh or frozen peas
- 400g (14oz) tin (can) chopped tomatoes
- Salt, to taste
- FOR THE MASALA
- 200g (3⁄4 cup) unsalted butter
- 1 large red onion (about 250g/9oz),
- finely chopped
- 1 tsp cumin seeds
- 1 tbsp red chilli powder (more or less
- to taste)
- 1⁄2 tsp ground turmeric
- 4 fat garlic cloves, grated
- 2.5cm (1in) piece of ginger, peeled and grated
- 1 red (bell) pepper, finely chopped
- 1 tbsp garam masala
- Salt, to taste
- TO SERVE
- Soft buns
- Butter, for spreading
- Coriander (cilantro) leaves, chopped 4 lemon wedges
- 1 red onion, finely chopped
Instructions
- Put the potatoes, cauliflower, carrot, peas and tomatoes in a large pot and add just enough water to cover.
- Bring to the boil and cover with a lid. Cook for about 20 minutes, stirring occasionally until the potatoes and vegetables are soft. Using a potato masher, mash it all up. It should be
a bit wetter than mashed potato consistency – like creamy and slightly chunky potato soup – so add a drop of water if needed. Season with salt and keep warm. - Melt about 100g (7 tablespoons) of the butter in a large frying pan over a medium–high heat. Toss in the onion and cumin seeds and fry until the onion is soft. Add the chilli powder, turmeric, garlic, ginger and red (bell) pepper and fry for a further minute or so. Stir in the garam masala and season with salt.
- Whisk this mixture into the mashed vegetables. Top with the remaining butter and allow to melt.
- To serve, cut the buns in half and butter them generously on both sides. Place them buttered-side down in a hot frying pan to brown. Place the toasted buns on warmed plates with a good helping of the bhaji. Sprinkle with coriander (cilantro) and serve with lemon wedges and red onion on the side.
Recommended Products
As an Amazon Associate and member of other affiliate programs, I earn from qualifying purchases.


Nutrition Information:
Yield:
4Serving Size:
1Amount Per Serving: Calories: 330Total Fat: 8gSaturated Fat: 4gTrans Fat: 0gUnsaturated Fat: 3gCholesterol: 15mgSodium: 501mgCarbohydrates: 62gFiber: 11gSugar: 10gProtein: 9g


Leave a Reply